
In my last entry on this build I had finished most of the flat work. That means it’s almost time to hit the lathe. The first order of business was to select some straight grained wood to use to turn the dowels for the vise screws. Like chair parts, grain that runs out the side of the screws will significantly weaken them.
I ripped the stock to 1 3/8″ squares. Then I cranked the blade over to 45 degrees and installed my aux fence to rip off the corners to make octagons.

After getting the octagons made I marked the centers on each end. Now I’m ready to hit the lathe. I chucked the dowel stock up and started to turn them round with a roughing gouge. After getting close to the 1 1/4″ desired diameter I started to focus on getting them as even as possible. I then took a parting tool and turned three rings onto the dowel that were right at 1 1/4″ or maybe slightly larger. From there it was a matter of just focusing on a really flat dowel. When I was close I switched to a technique I learned from Christian Becksvoort. He uses this technique when turning table legs to ensure the tapers are straight. It’s very simple. Take some sandpaper (adhesive backed would be best I didn’t have any) and wrap it around a flat block of wood that is just a couple of inches shorter than the length of the section that you want to ensure is flat.
With the lathe running and the tool rest moved out of the way, carefully put the sandpaper against the work and move it back and forth lengthwise ensuring that you are providing equal pressure across the sanding block. This makes a perfectly even dowel. I continued this until the three rings disappeared. Following Chris’s advice I sanded just a little more to make the dowel just a hair under 1 1/4″. It took me about an hour to make the first dowel and about 15 minutes each to make the other three. If you’re into this kind of turning I wouldn’t blame you in the least if you just bought the dowels from Beall.

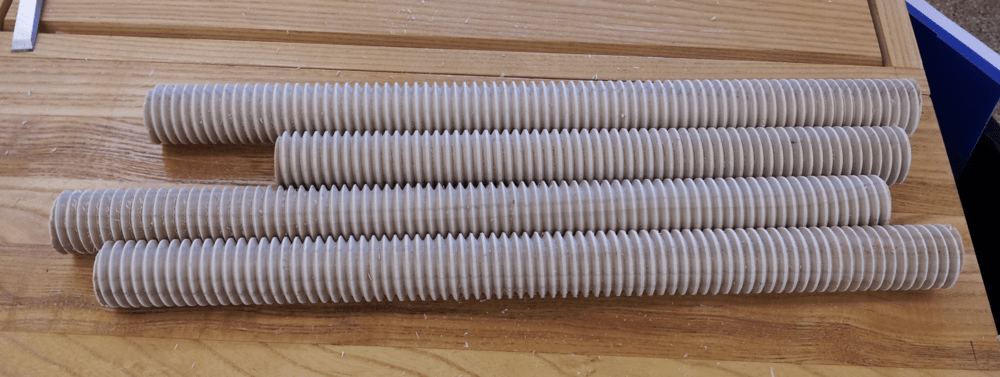
Ok, with four dowels made I was ready to make some screws. The Beall Tool Company threader is router powered. You clamp the jig in a vise and then the router mounts on top of the jig. A centering tool is included to ensure that the router bit is centered in the jig. Your goal is to make a screw with about 1-1.5mm of flat area on the top of the threads. That makes for a good fit. If the bit is too low the screw will be really loose. If it’s too high the screw will bind in the jig. This is what I found to be the correct amount of projection for the bit – just as a rough guide.
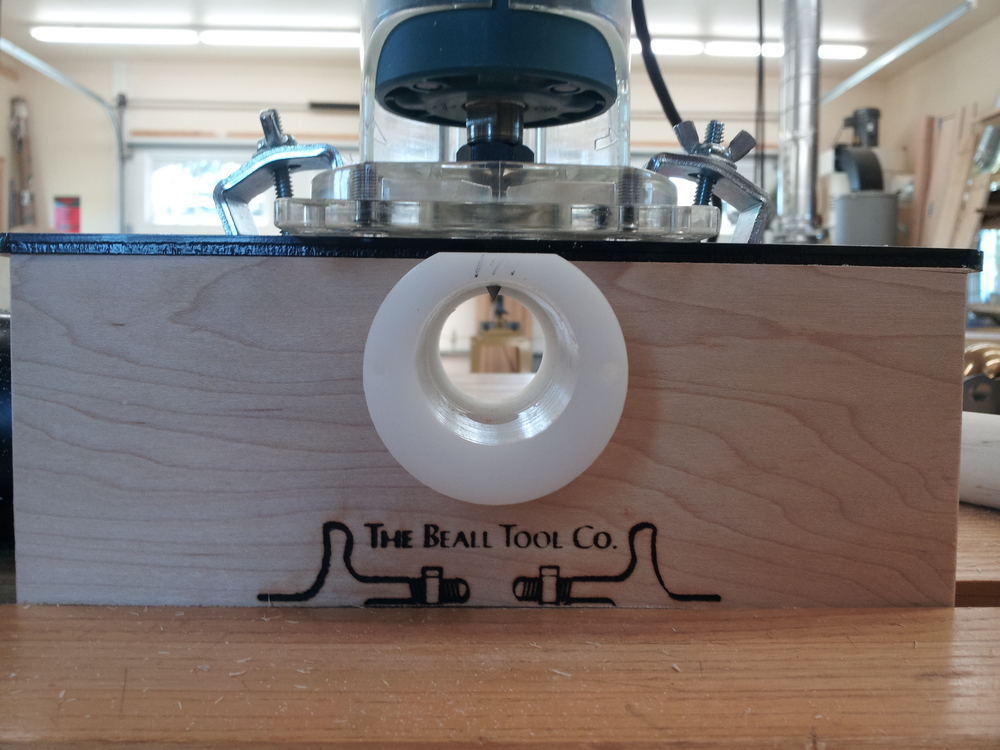
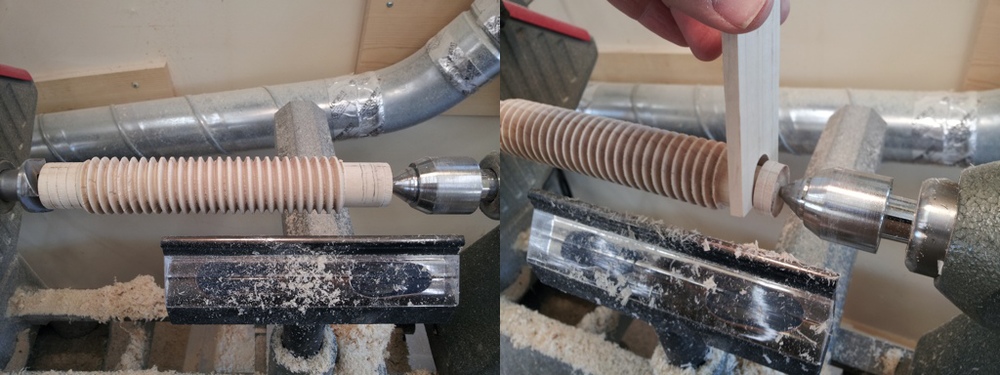
As you can see, the front half of the Delrin insert is smooth and the threads start after the router bit. The manufacturer recommend making a handle that clamps onto the dowel to aid in turning it through the jig. I made the handle and worked to dial in the router depth working through one whole dowel. WIth the recommended handle it was difficult to keep the dowel turning consistently and to keep it concentric in the jig. I decided to try a different approach. I screwed a small hex head screw in the the center of the dowel and then used my cordless drill, set on its slowest setting, to turn the dowel at a consistent speed without having to start and stop to reset my hand on the handle. If you try this method you must make sure that your dowels are not too large and that the bit depth is dialed in by trying the fit in the holes you’ve already tapped. You don’t want to cram your dowel into the jig with the force of an 18V drill. I only pulled the trigger a little bit and I had the clutch set so that the drill would skip with just a little resistance.

When I got to this point it was very quick to turn out the screws. This is a nice jig.
Next I had to turn the handles to have something to use to fit the tenon from the screws. Nothing creative here.
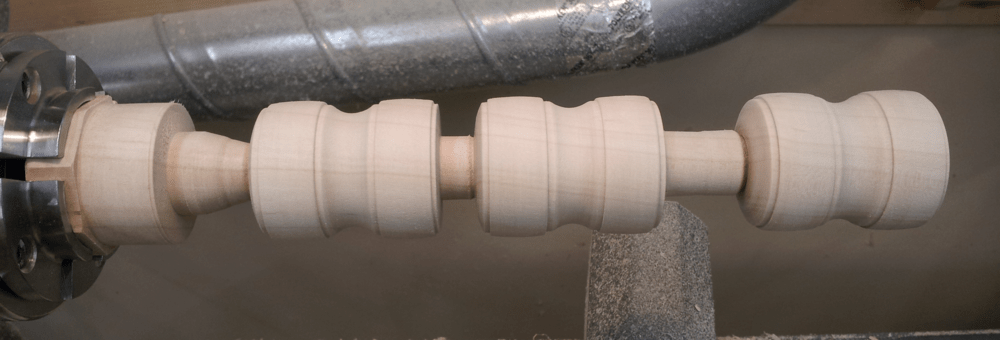
At this point I would put a 1″ Forstner bit in a Jacobs chuck in the tail stock and bore the mortise into the handle. Then I would put the center back in the mortise and part the handle off…and repeat.
Next up was turning the tenons on the screws for the handles and the tenons that go into the vise block. Make sure that the tenon fits in the garter hole with a little room to move and that the garter has just a little play as well. If things are too tight and don’t line up perfectly your wagon vise won’t operate smoothly.
After everything fit properly I epoxied the handles onto the screws. Why epoxy? Because I’m not a CNC turner. Although by tenons had a decent friction pit I couldn’t be sure if they were tight the whole through the mortise. PVA or hide glue would shrink when it dries and leave voids. Epoxy won’t shrink and ensures that there is a good bond to the whole tenon. I don’t want this to be the weak spot.

Well, that’s it for now. Hopefully the next post will be the last in this series. All that’s left is to do a little pre-finishing, glue it up, install some screws, peg the corners and apply the finish.
Thanks for reading!

I don’t suppose you’d consider making a couple of those wooden screws for sale, would you?
I need two about a foot long.
LikeLike
Sorry Tara but I have long since returned the jig for making them. However, the screws would be of little use without the accompanying threaded hole to receive them. Since the threaded holes are not standardized they really need to be matched to the screw – or vice versa. So, I’m not sure just purchasing the wooden screws will do you much good.
LikeLike